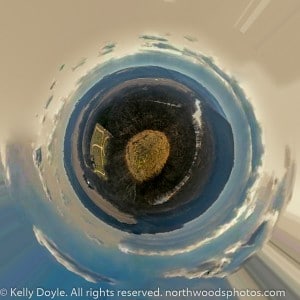
Learned a cool technique from Ben Wilmore during Photoshop Week on Creative Live a few weeks ago: how to transform a landscape panorama into a Photo Planet!
Basic Photo Preparation
This was my first attempt at this technique, so it’s a little rough. I also don’t currently have an ideal shot to apply it to (you want a nice panorama) and it was taken as a jpeg with a point and shoot camera, resulting in more artifacts in the sky than I like, but here’s the general “how to”:
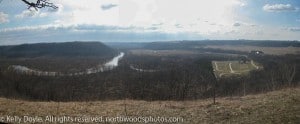
This is the image I started with before any edits at all:
 You can see how the sky has got some artifact and there’s a distracting tree branch imposing on the upper left side of the frame, but what I was looking for when selecting an image was one where the right and left edges would blend together fairly well without too obvious of a seam. The horizon matches fairly close, as does the grassy area in the foreground.
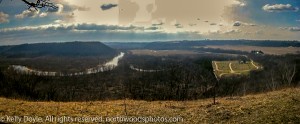
 I did some of the basic edits in Lightroom to adjust clarity, contrast, vibrance / saturation, and get the tonal properties the way I wanted them. Then took it into Photoshop CS6 for further editing to get rid of the tree and some of the artifact in the sky.
How to Make a Photo Planet
Now to the nitty gritty:
Filter -> Other -> Offset
Use horizontal slider to move the edge of the photo towards the center. Make sure the wrap around setting is turned on so that the image “loops around” and the right and left sides join together. At this point, you will notice an obvious seam that will need to be blended. I used a combination of spot healing and patch tool with content aware fill to do what I needed for this particular image. Content aware has become a good friend 😉
Once you’re happy with your seam touch up, you need to convert the document to a square shape:
Image Size -> note number of pixels of longest edge. Deselect constrain proportions (it may be a chain symbol depending on your version of PS), and manually enter the pixel size of the longer edge to both height and width so that they are the same. Your image will now look distorted / stretched.
Now you need to flip the document upside down or your sky will be the core of the planet instead of the ground:
Image Size -> Image Rotation -> Flip canvas vertical
Make sure your document is in 8 bit or this next part won’t work:
Filter -> Distort -> Polar Coordinates
This will give it the round shape. You now have a photo planet!
Filter -> Distort -> Pinch (I used 50%, which was the default) to pull in the center a bit.
Fin.
